January-May
Information about LiFePO4 batteries:
- Should be charged early and often.
- If not used for a long time, should be kept at a charge level of 40%-60%.
- Should never be discharged below 2.2 volts.
- The discharge curve is very flat, after which the drop in voltage is precipitous.
- Can discharge at 7C continuously and 20C instantaneously.
- Age faster at high temperatures.
- Should not be frozen (below -40°C/-40°F).
- Packs with large numbers of cells need to have a cells SOC balancer.
- Time durability: >10 years
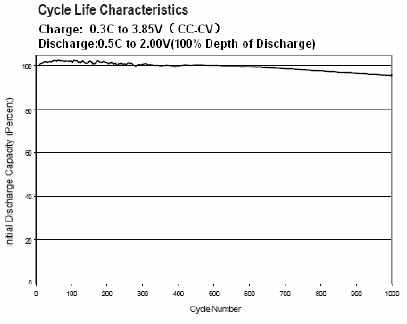
- Cycle durability: 2000 cycles
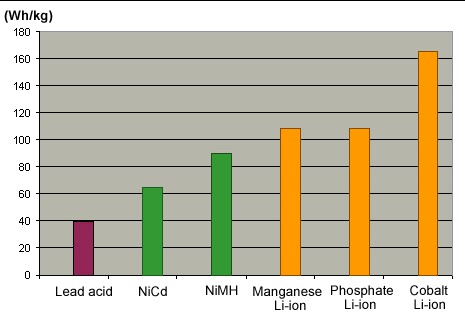
- Energy/weight: 90-110 Wh/kg; Energy/size: 220 Wh/L; Power/weight: >3000 W/kg
See www.batteryspace.com/prod-specs/HLCF18650PLi-ion.ppt for more information.
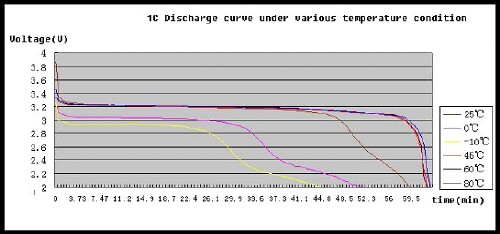
1C discharge curves for LiFePO4 battery for different temperatures:
5 June
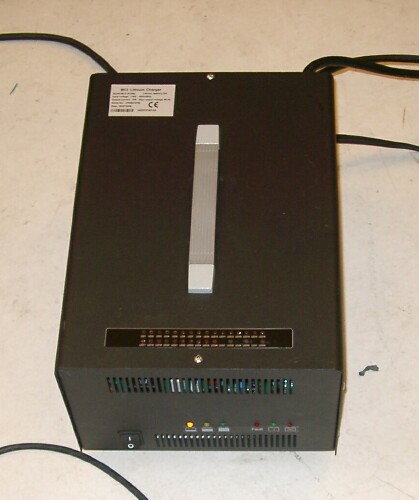
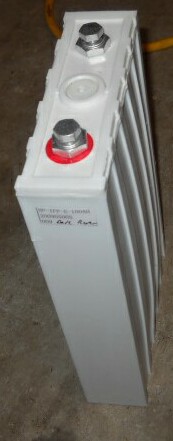
I ordered 26 LiFePO4 100-AH batteries from RCEV Products:
|
and a 95V charger:
|
|
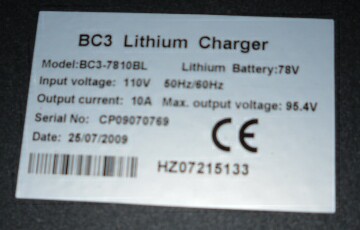

The batteries charge up to 3.65 volts/cell and float down to 3.35 volts/cell; so the 26 batteries will vary from 94.9 volts immediately after charging, floating down to 87.1 volts in a few minutes. They must not be allowed to go below 2.2 volts/cell (57.2 volts for the 26 batteries)! RCEV Products recommends not going below 2.75 volts/cell (71.5 volts for the pack); see the discharge curves above for the reason why.
At float voltage of 87.1 volts the 100AH batteries carry an energy of about 8.71 kWh for a 1-hour discharge. At a cutoff of 71.5 volts the batteries contain about 70% of the energy initially in the battery. At 3 miles/kWh, I should be able to drive about 18 miles per charge.
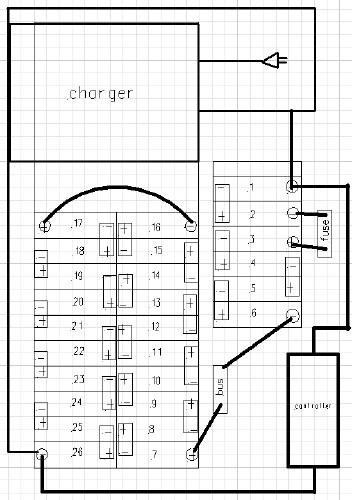
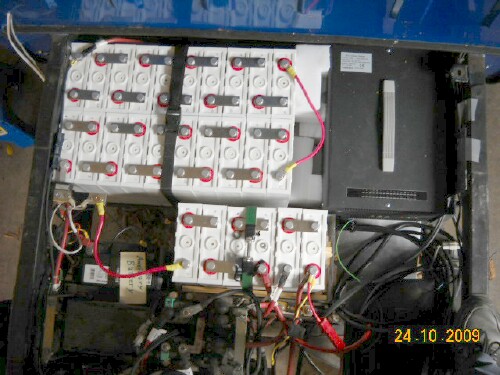
Here is how I laid out the batteries and charger:
Actually, the charger is turned the other way with the cords to the front and the on-off switch and indicator lights to the back.
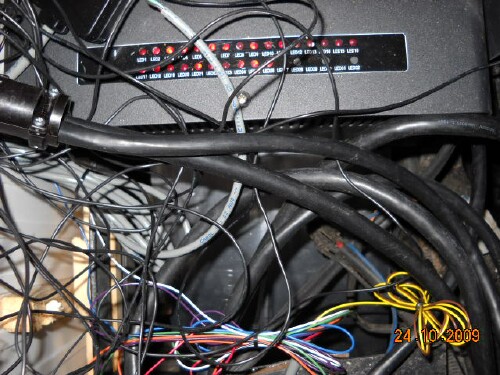
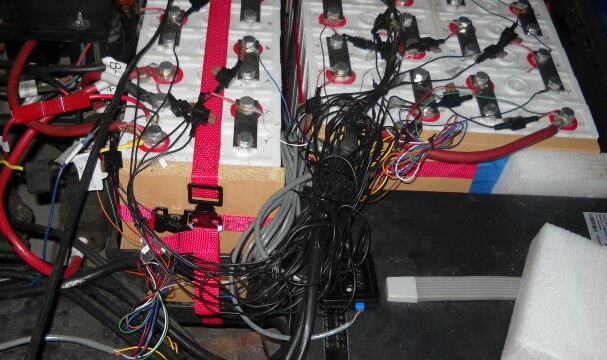
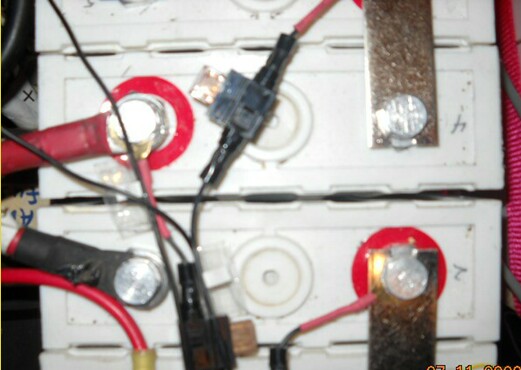
The 22 short bus connectors between the 26 batteries are shown below; the other 3 connectors are wires. There are two current-measuring buses at the connection between batteries 4 & 5, one for the PakTrakr and one for a large top-of-the-dash display. The 300-amps fuse is between batteries 2 & 3.
I had to take the cord that goes from the most negative battery to the controller out of the grommet that held it in front of the batteries in order to have enough length to connect to the battery.
Some metal of the shelf for the old charger had to be cut in order for the new charger to fit; it is a tight fit. The old five plastic battery trays were discarded and a piece of sheet metal, sprayed with black Rust Oleum, was cut to fit in the bottom of the large battery box to support the batteries. A piece of aluminum was placed in front and below and another piece on the outside of the charger to protect it from road water splashes.
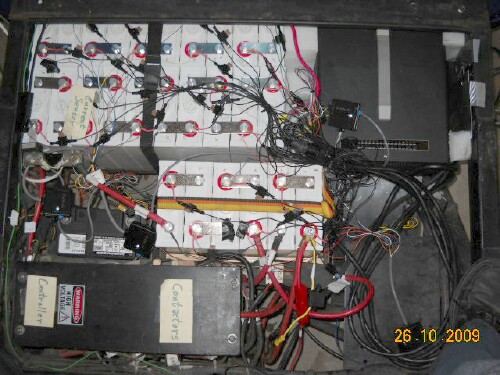
Here are pictures showing the 26 wires that connect the batteries' balancer in the charger box to the positive terminals of each battery:
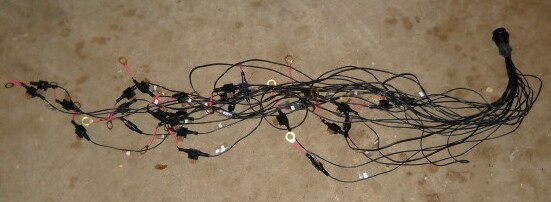 |
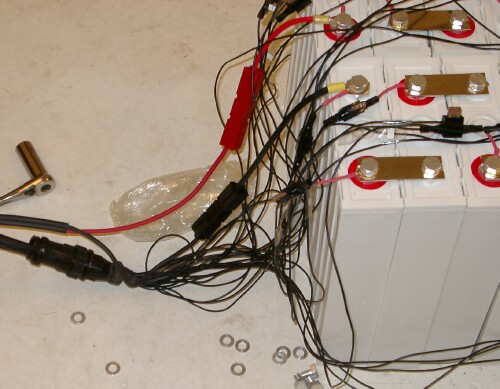 This also shows the buses between the batteries and shows the charging cables. |
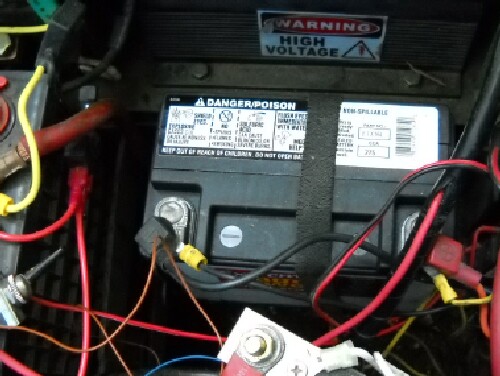
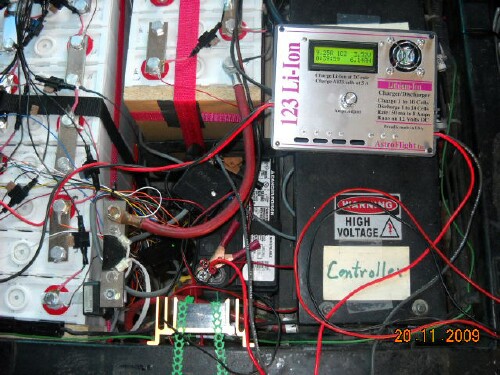
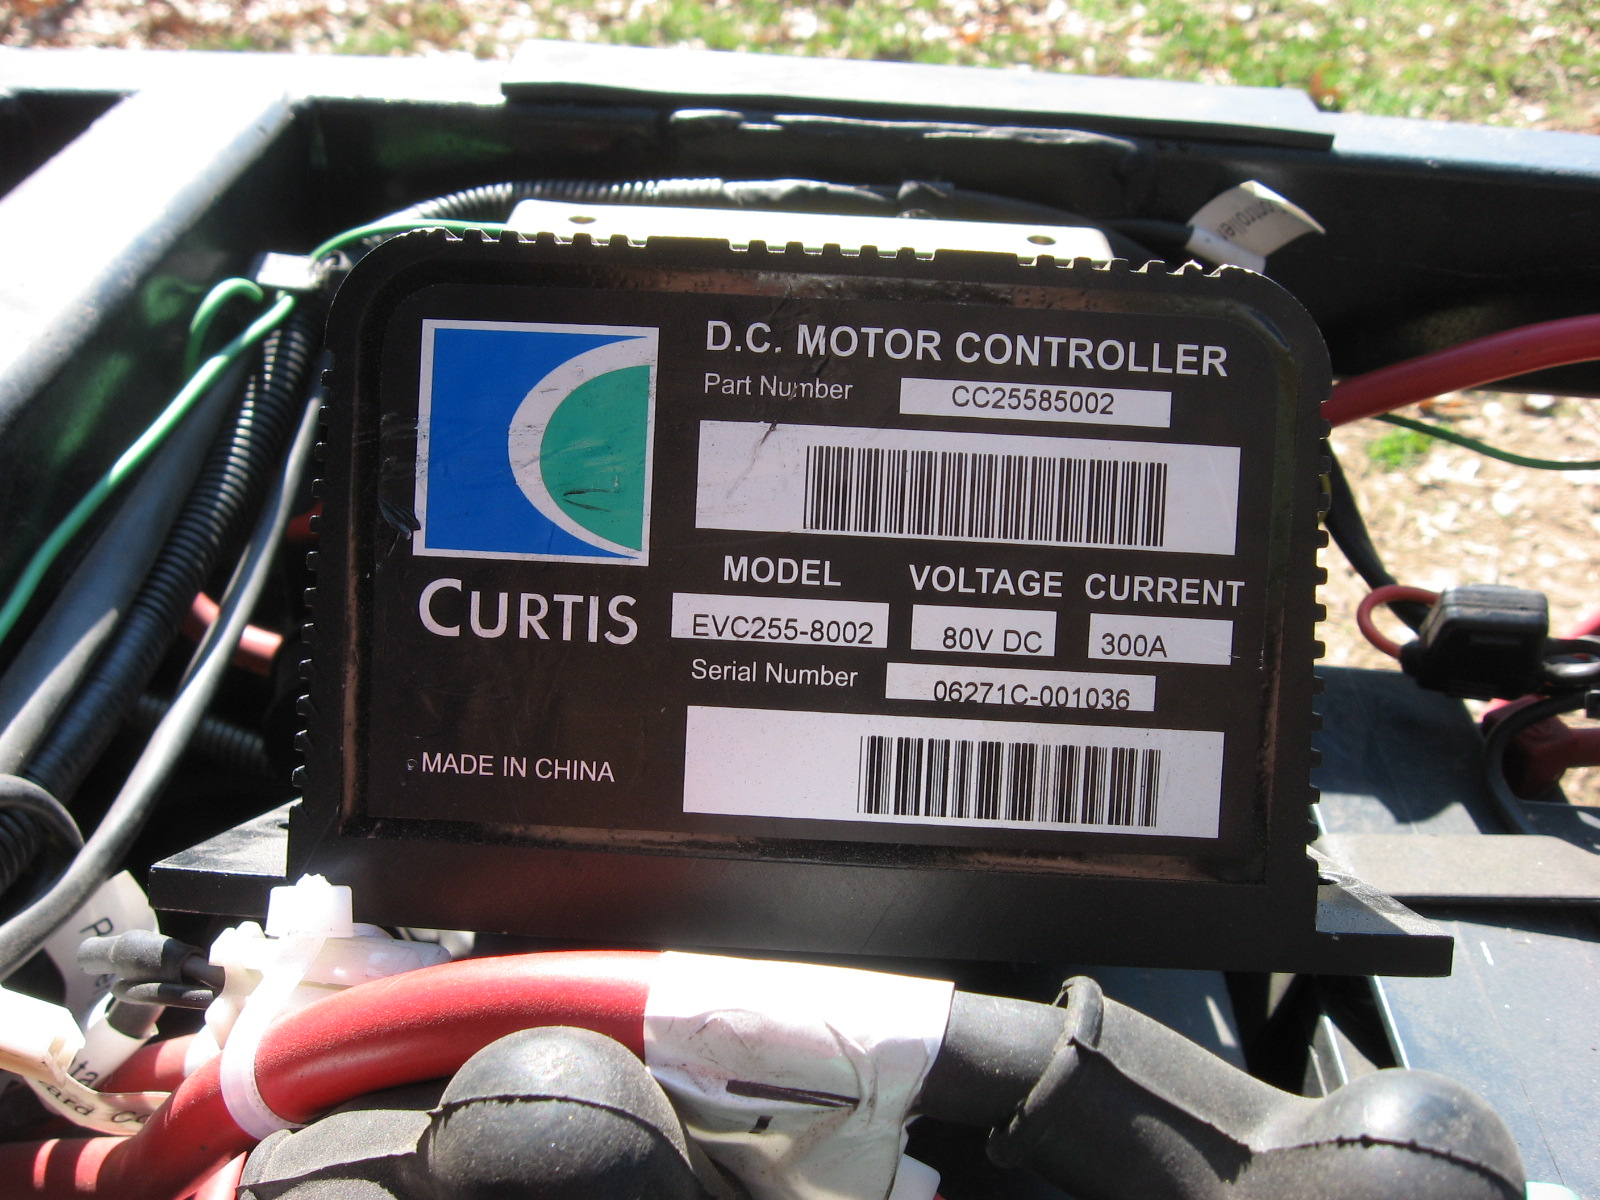
The DC-DC converter and the Curtis controller can handle 100 volts input.
PakTrakr makes a LiFePO4 device for 8 batteries. Since I already have the small Paktrakr display, I need only 4 remotes. I hope that Woodward will make a version of his large PakTrakr display to display voltages for LiFePO4 batteries. So the positive poles of the 26 batteries will have two extra wires on them, one for the balancer and one colored one for the Paktrakr. Each Paktrakr also has a black wire that connects to the negative pole of the most negative battery for each remote, which is connected first.
These batteries are supposed to endure 2000 charge cycles. If I drive Sun Roper every day that would be about 5.5 years. I expect them to last ten years.
6 June
23 Oct
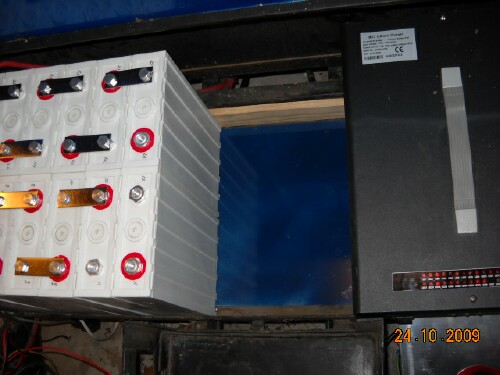
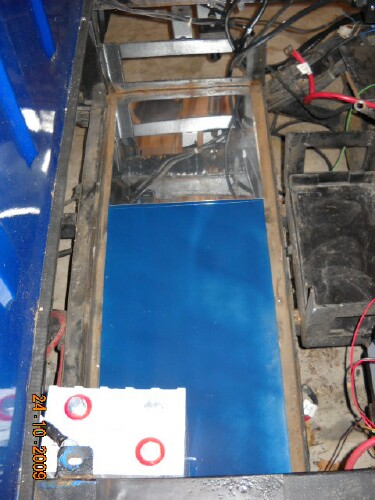
Empty battery boxes |
1/8" steel plate, painted with blue Rust Oleum on both sides, under batteries & 1/8" aluminum plate under charger |
 Wood chock in front of batteries in large battery box. |
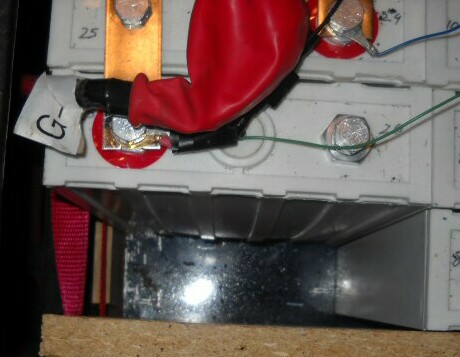
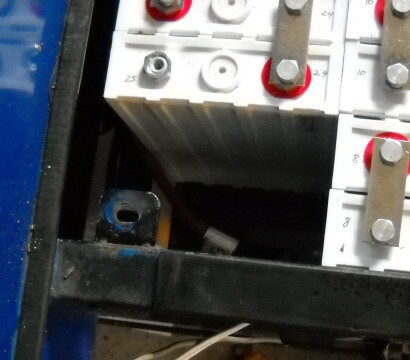 Tab that was sawed off since it interfered with most negative terminal. |
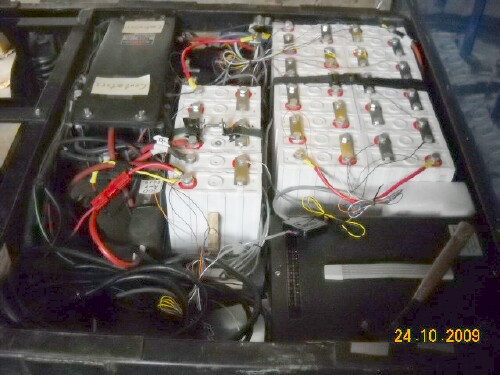
 Batteries and charger in place before installing the PakTrakr and the balancer leads. Note the two current buses just below the left corner of the large battery box. Note foam padding between batteries and charger and wood chocks around the small battery box. I later got a strap to put around the long axis of the small battery box instead of the strap around the short axis. Batteries and charger in place before installing the PakTrakr and the balancer leads. Note the two current buses just below the left corner of the large battery box. Note foam padding between batteries and charger and wood chocks around the small battery box. I later got a strap to put around the long axis of the small battery box instead of the strap around the short axis. |
Four PakTrakr remotes installed. Remote A for 6 batteries, Remote B for 6 batteries, Remote C for 6 batteries and Remote D for 8 batteries. The display did not show a lithium-battery option, so I sent it to PakTrakr for reprogramming. |
 26 balancer leads installed. In the future I may shorten most of the long leads. |
Battery balancer lights and aluminum sheet sloping down under charger/balancer to repell splashes from the road. |
25 Oct
Connected the solar panel over the bed to the LiFePO4 batteries. In full sunlight it trickle charges the batteries at about 1.1 amps and slightly less than 100 volts, about 100 kW power.
26 Oct
Had the Sun Roper brakes checked for no dragging and had it lubricated at M&M Tire.
27 Oct
Drove 15.1 actual miles, used 4.86 kWh for 3.10 miles.kWh on mountainous Merrimac Road.
Chris Roberts helped me replace an old contactor with a new one. They are difficult to replace; had to remove the screws from two of them to replace one of them.
28 Oct
I received word to check for puffing out of battery 26. It was puffed out on both sides:
Sent the battery-pack batch number so that a matching replacement battery could be airshiped. Here are the instructions for replacing a bad battery:
- Inform the company of the batch number of the pack.
- A matched fully charged cell will be sent.
- Customer use a power supply to charge all the other cells and the new cells fully one by one with constant current at 0.3C up to 3.65 volts and constant voltage 3.65 cut-off current 0.02C. (My dealer is sending me a single-battery charger.)
- Use the balancing charger to charge the whole pack and monitor the voltage of each cell (any cell should be no more than 4 volts & minumum voltage should be no less than 3.5 volts and check whether all the LED lights are bright or not. If nothing abnormal, the batteries will work now.
- First time discharge let the battery work until 30% capacity remains, then charge the pack with the charger fully.
- After the charger turns off, turn it back on. Do this 2 or 3 times and make sure that the none of the cells are over 4 volts.
30 Oct
2 Nov
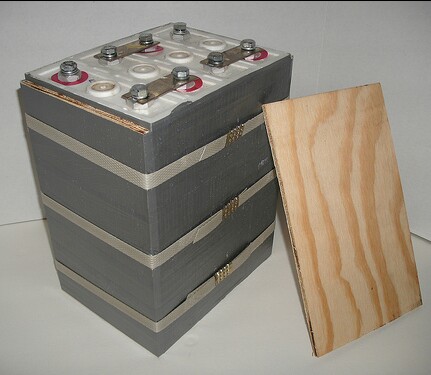
"Here you see 4ea, 3.2volt nominal 100Ah LiFePO4 cells strapped together into a 12.8vdc nominal battery pack.
The plywood pieces are on the face ends of the outer cells, to keep them from bulging under use, and the strapping keeps the pack nice and tight, so tha the busbars do not damage the internal battery posts.
Later, I'll apply a "Fleece" sock around the pack, and soak it with a fiberglass resin. This will protect the battery from being damaged. The use of the duct tape keeps the fiberglass resin from adhering to the individual LiFePO4 cells, so that if the pack ever had to be pulled apart for cell replacement, it will be much easier to do so.
IMPORTANT NOTE: Even though the batteries haven't even been used, some are already showing a small amount of bulging, merely from standing up, over time the plastic flexes. This allows the internal plates to separate somewhat, will cause capacity loss, and eventual failure from dry spots on the plates. Anyone who uses prismatic cells, please, please restrain your cells or you'll not be happy with yourself later. Cylindrical cells don't seem to have this problem, but who wants to weld up several hundred batteries into a pack, not me. "
3 Nov
8 Nov
10 Nov
20 Nov
Hooked an automobile charger to the 12V battery to keep it from running down. It took about an hour to charge each of the 25 batteries. The PakTrakr worked fine for the 26 batteries except that one of the 4 remotes only showed 5 of the 6 batteries to which it is connected. I asked PakTrakr about this.
23 Nov
Bought a 12V trickle charger from Advance Auto and hooked it to the 12V battery. I will plug it in every time I charge the traction batteries.
Desulfator is at lower left and trickle charger is at right center.
Sent the bad PakTrakr remote back to check for a bad solder connection.
24 Nov
The new battery #26 is going up to 4.32 volts when charging, then floats down to 2.35 volts. The PakTrakrs are on. Discovered that the 5-amps mini-fuse on the balancer lead to #26 battery is blown; perhaps the original bad battery blew it. Replaced it with a 3-amps mini-fuse; will get 5-amps fuses tomorrow.
26 Nov
I could not get out battery #1 out of the 6-batteries pack. So I looked at #3, which occasionally showed more than 4volts when charging, and it is slightly puffed out:
It caused that 6-batteries pack to press tightly against the two end boards I had put in such that I cannot get out #1 or any other battery in that pack. I had been watching #3 to see if it looked puffed from the top, but did not detect it previously. I think I was looking at it before it was fully charged.
Then I looked at #25, which also occasionally showed above 4V, and it is slightly puffed, but not as much as #26:
There was one other battery that occasionally showed above 4V, but it does not look puffed from the top. It is about #23 or #22.
So, I put #26 battery back in its usual #26 place.
Will the puffing go down when I drive it? If not, I do not know how I am going to be able to get #3 out of the 6-pack. I will try putting screws in the sides of an end board to use to try to pull it out.
The #25 balance light hasn’t shown in a long time at the end of charging. Most of the time #25 has not shown and some of the time #3 has not shown. Last night all lights shone at one point except #25 & #26.
Will drive a long distance today to see if the puffing goes down. Then I will not charge any more or at least not all the way to when the voltages get above 4 volts.
It appears that I have at least 3 puffed batteries! The puffing has not reduced the power I have when driving. That was true when the first #26 battery was in and puffed, also.
So many “bad” (4) batteries make me think that the perhaps the balancer is bad. Or the battery batch is bad!
27 Nov
Am now watching the battery voltages so that none get above 3.9 volts when charging.
28 Nov
- Discharge the pack and monitor the voltage of each cell. When any cell reaches 2.3V, stop discharging and then record the voltage of all the cells.
- Discharge any cells over 2.9V individually until they are 2.3V.
- Charge the whole pack and monitor the voltages of the cells.
- Check that all the LED balancer lights are on near the end of charging and that the charger can shut off automatically.
29 Nov
There appears to be more puffing out of #3, #25 & #26 batteries.
Put 8.11 kWh in the batteries, which would correspond to about 30 miles of driving!
1 Dec